Creating a website has now been made easy with the use of Pagecarton, it's not necessary to know much about coding. If you have your contents ready, and the style of how your website wants to look, your website creation with pagecarton is as easy as ABC.
For this tutorial, we will be using an offline server called LOCALHOST. After installing your favorite offline server, pagecarton will be needed to install on it so that we can access the pagecarton admin panel locally. If you don't have pagecarton installed on your pc, you can download the latest version of pagecarton on Latest PageCarton Update, and go to Installing PageCarton for the simplified instructions on how to install pagecarton on your offline server.
So when successfully installed, go to the PageCarton admin Panel to access your admin panel and get started on your website creation. A pictorial example of the page is shown below:
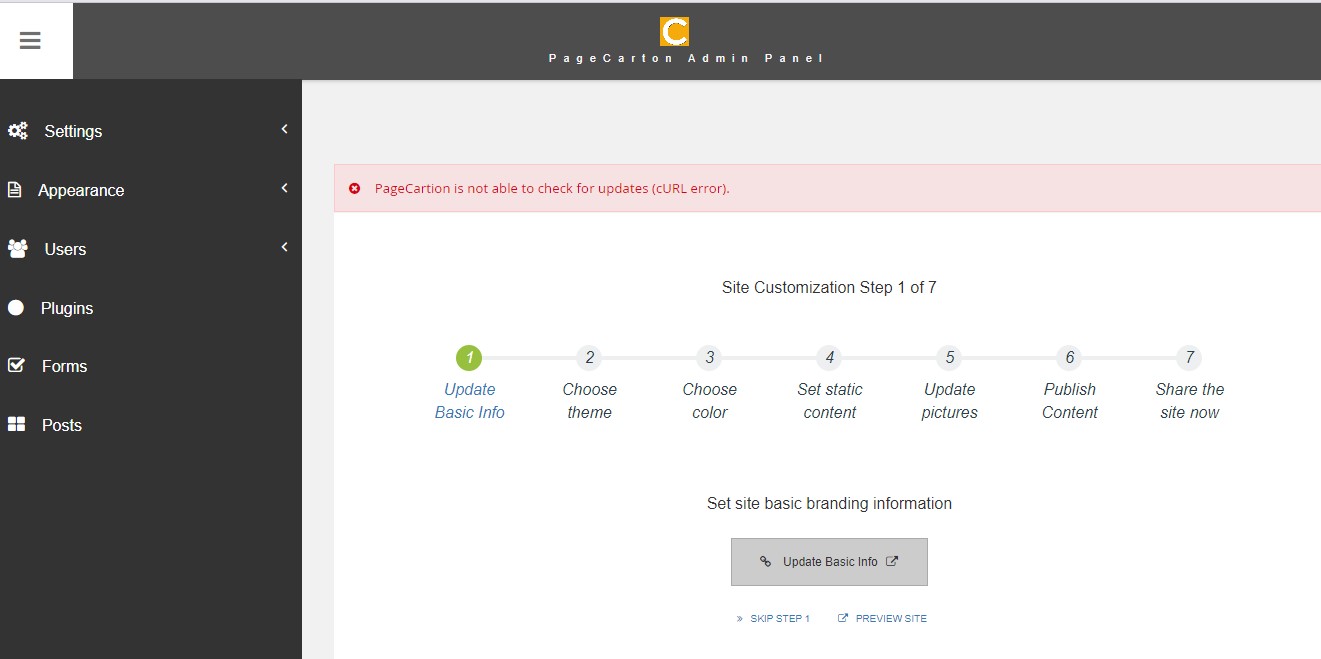
As shown above, there are 7 steps needed to complete the website creation, and after completing a step, you will get access to start the next step. You can also preview your site (using the 'Preview Site' button) to check for the changes you make on the website.
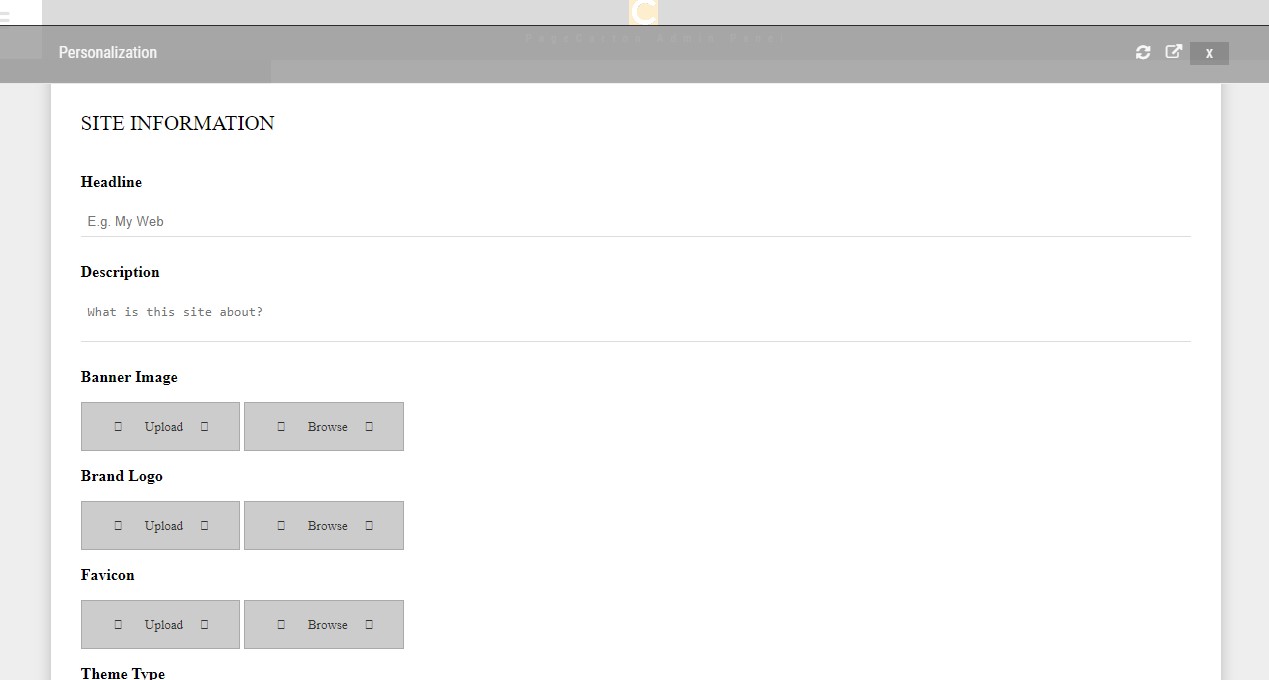
STEP 1 (Update Basic Info): You get to update the details of the site information, which include the site headline, site description, brand logo and the favicon of the website. When they have all been updated, click on continue to go to the next step.
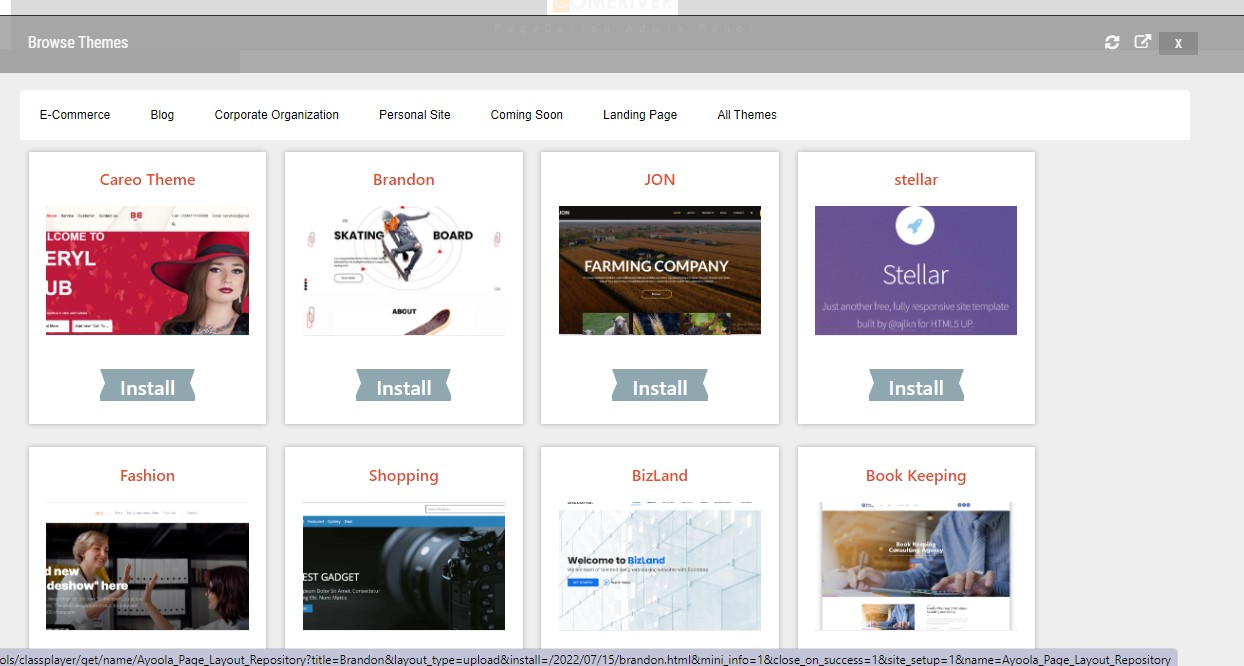
STEP 2 (Choose Theme): Here, you get to pick your desired theme, according to how you want your website to look. Click on the 'Install' button below the theme you wish to use, then click on 'Install theme' in the next page loaded. Click on 'Set as Default Theme' to make it updated automatically on our website.
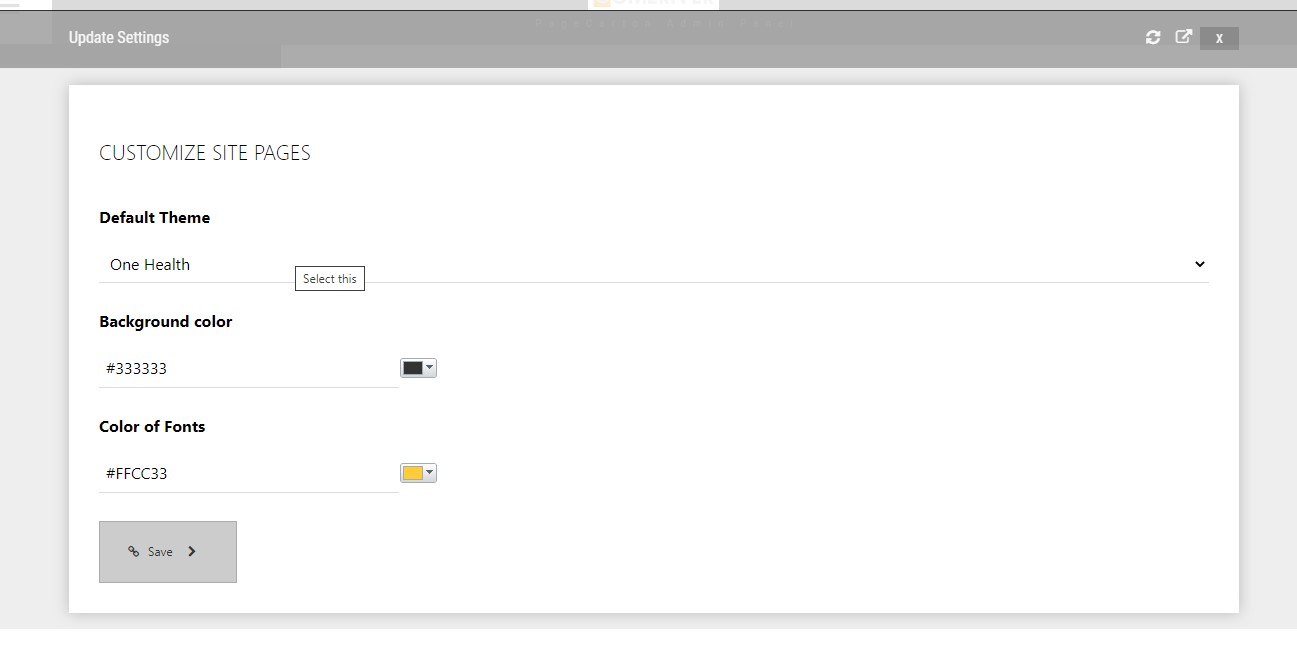
STEP 3 (Choose Color): You get to choose the font color and the background color you want, but you can ignore it if you are cool with the way your website looks with the default color.
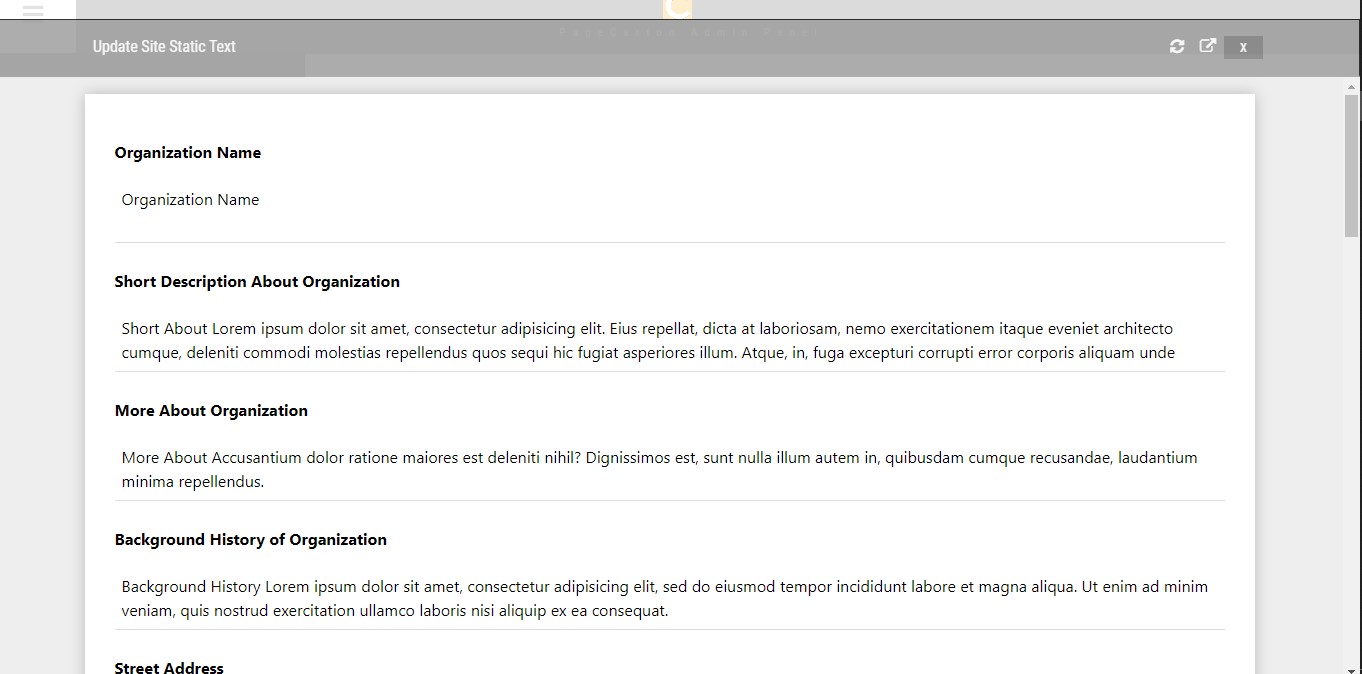
STEP 4 (Set Static Content): On this page, you can set your static texts to what your website is. You get to update your organization name, the short description about organization, the social media links of the website, location, etc.
STEP 5 (Update Pictures): This contains all the pictures that is being used on your website. It's just like your website's gallery. You can add and delete pictures in this section too.
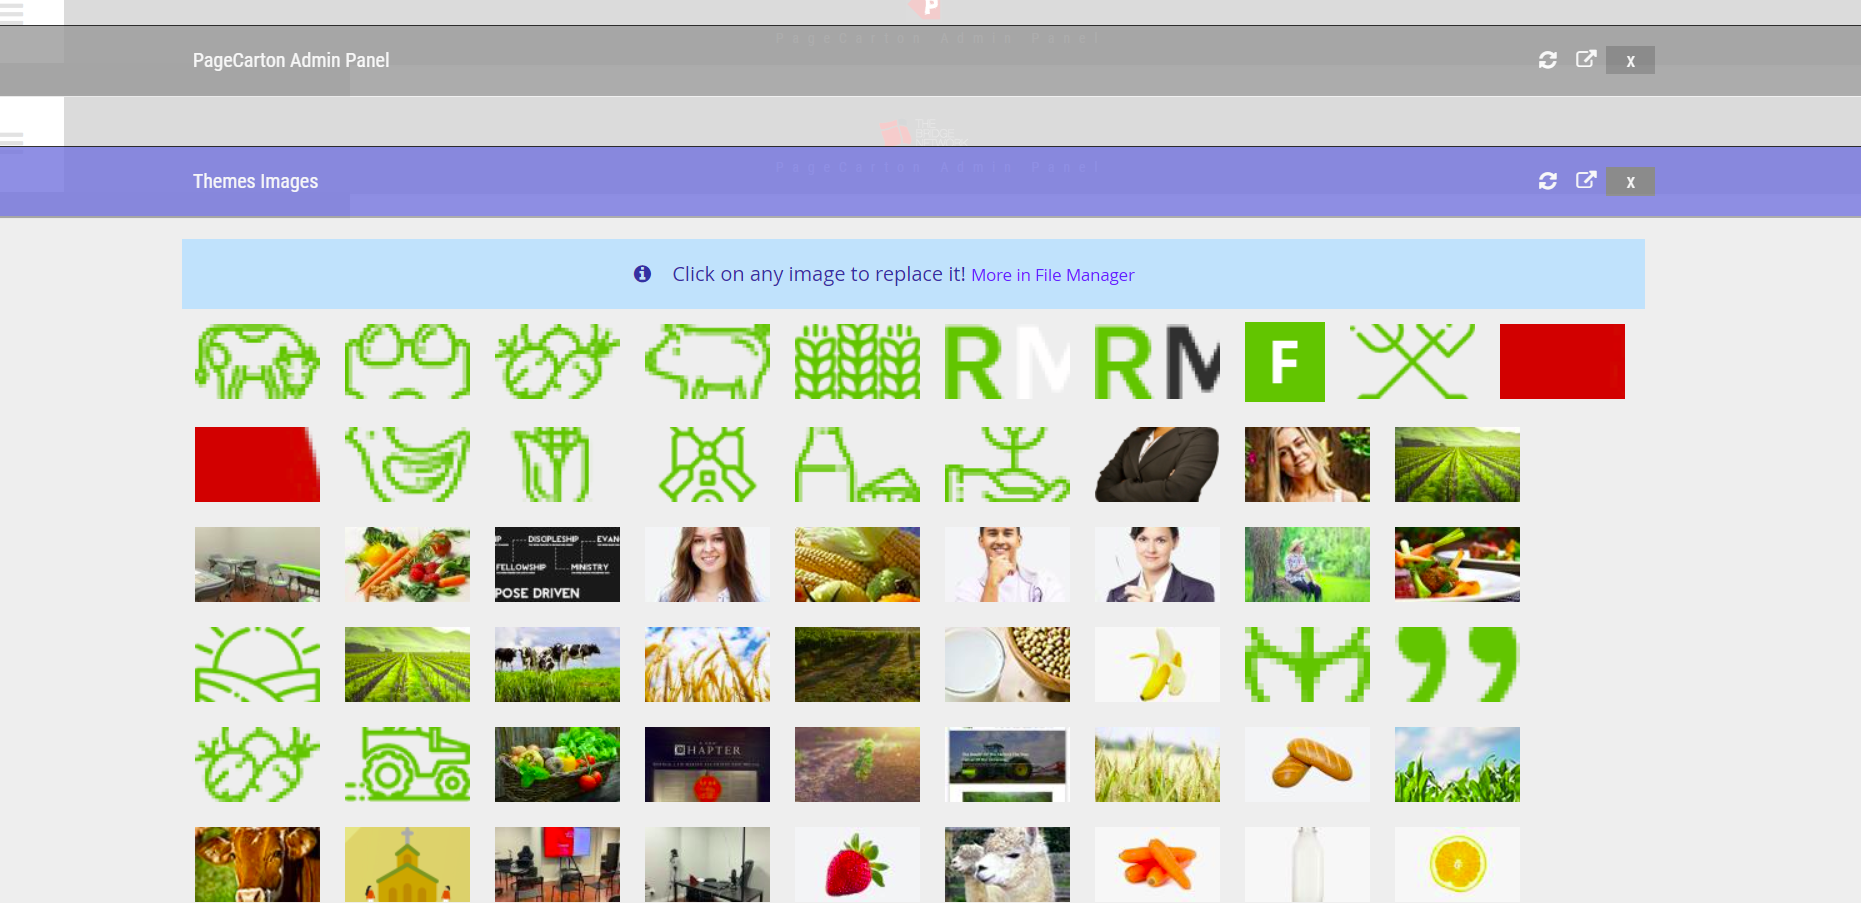
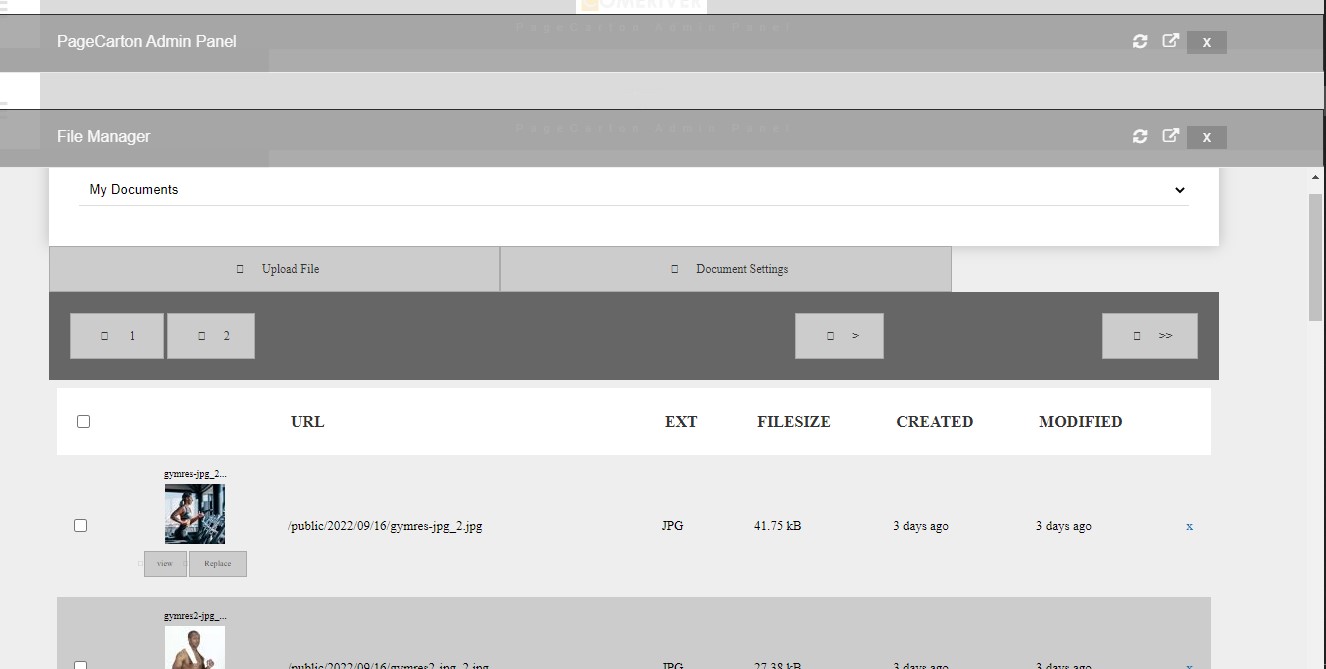
Click on the 'More in File Manager' to see all the uploaded pictures in detail. You can also view, replace and upload more files in this page. To delete any file or p[icture in this section, tick the checkbox ☑ at the left -hand side of the file you want to delete, then go to the bottom of the page where the list of pictures are, then click on the 'Delete' button.
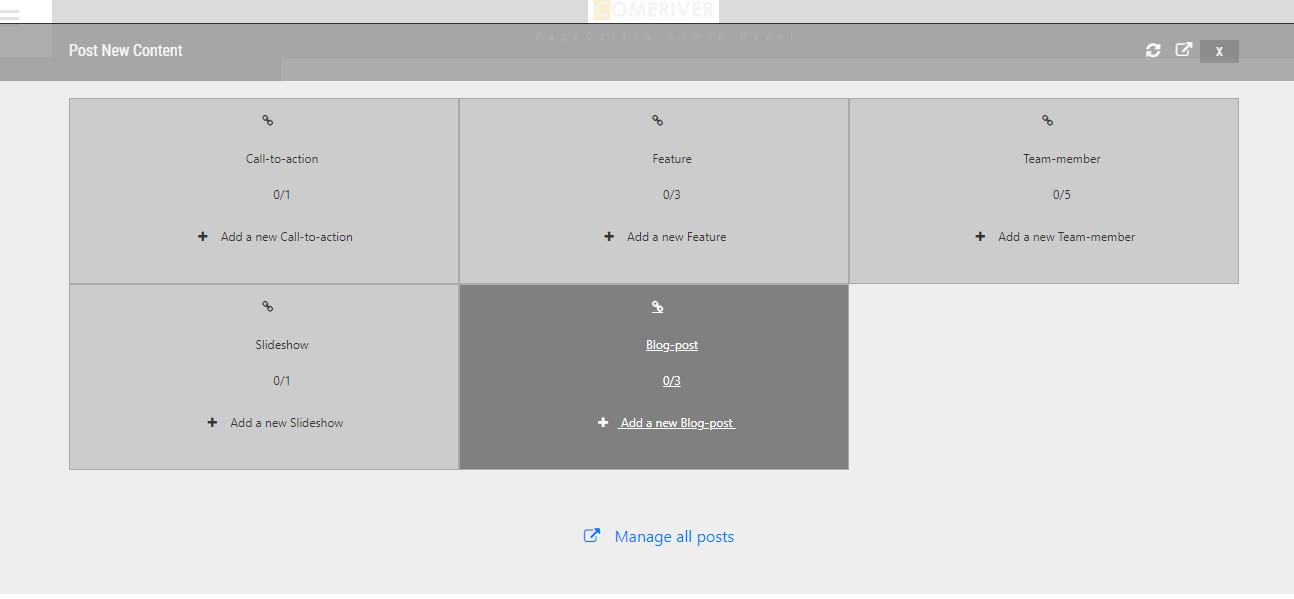
STEP 6 (Publish Content): This is where the main content of the page is updated or uploaded. You can get to upload the contents of your slideshow, testimonials, features, team-members, etc depending on the pattern of your website
Update the necessary information and contents needed in each step. When you are done, you can choose to share your website online or buy a domain to give you the full access to your website.
https://youtu.be/RPwvatT4EoA