PageCarton is an opensource project. This in simple terms means that you get to see the codes behind the awesome features PageCarton is bringing to the web. It also means that you are able to contribute to it, so that together, we could make a massive contribution towards a safer and more accessible tool to publish to the web. Contributing to PageCarton Core is easy; it may not even require coding knowledge. PageCarton is made for collaboration champions. Contribution is even enhanced with Github as the core of PageCarton is hosted on Github. This tutorial uses more of GIT, Github, VS Code and other tools that enhances collaboration.
The following are the steps required to contribute to the PageCarton core:
Set up PageCarton Core Locally
Let us set up PageCarton for local development. This allows us to try a lot of settings locally before we push it to git.
- Fork PageCarton on Github:
This allows you to have your own hosted development copy of PageCarton. Contributions to PageCarton would now be a "merge" of your own development copy and the main branch of PageCarton. The process of merging your copy of a repository with the main branch is called "Pull Requests on Github
Visit PageCarton on Github
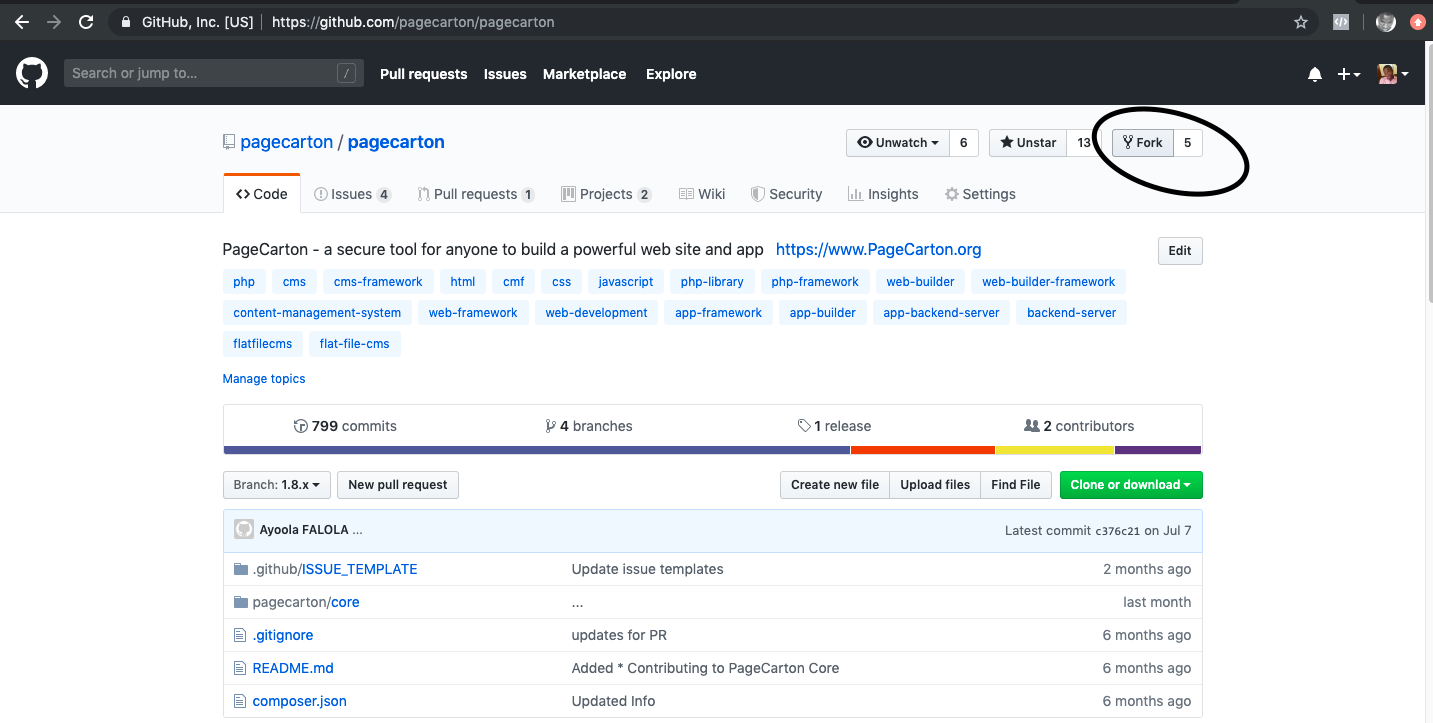
Click on "Fork". The URL to your forked version will be like “https://github.com/myusername/pagecarton”
- Install PageCarton
The next step into contributing to PageCarton Core is to get a working copy of PageCarton installed in a local environment. Steps and instructions to installing PageCarton can be found on the PageCarton installation page.
Installation Options
- Set PageCarton to run as core
By default, PageCarton is installed so that you can begin to publish content and create web site and apps. This mode tries to protect the "core" files from being modified. But it is possible to set PageCarton to run as core. Meaning that all changes you make will be updating the "core" files/directories instead of building up a new set of content. To do this,
- Copy PageCarton Configuration file "pagecarton.json" from "/pagecarton/local_html/" into your web root - this is the "www", "htdocs" or "public_html" directory depending on your installation
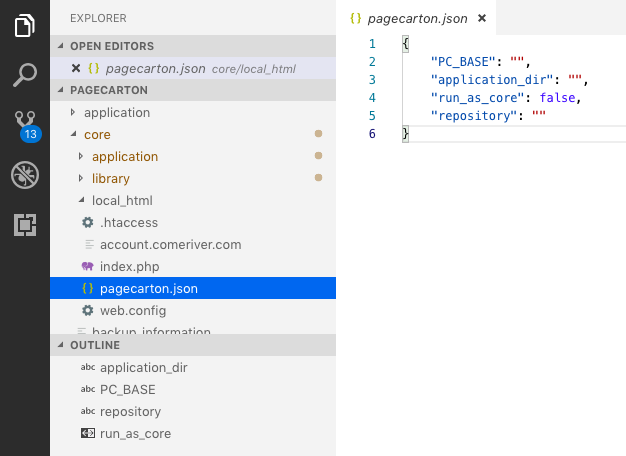
- Edit the contents of "pagecarton.json" so that "run_as_core" is set to true. Make sure it is the copy in the web root you change and not the one in the "local_html"
{ "PC_BASE": "", "application_dir": "", "run_as_core": true, "repository": "" } - Save the file.
- Copy PageCarton Configuration file "pagecarton.json" from "/pagecarton/local_html/" into your web root - this is the "www", "htdocs" or "public_html" directory depending on your installation
- Confirm that everything on the site is now showing and listing all core items as editable.
Set up your IDE
Usually, you would need more than a simple code editor to be able to use advanced features of GIT and other things required to contribute to PageCarton. An IDE is the good way to easily manage your development.
An integrated development environment (IDE) is a software application that provides comprehensive facilities to computer programmers for software development. An IDE normally consists of at least a source code editor; build automation tools, and a debugger.
For the purpose of this tutorial, we will be setting up Visual Studio Code "VS Code". But any other IDE like Atom, Netbeans, etc should do. If you would like to download VS Code, follow the instructions below:
- Download your VS Code
Download Visual Studio Code - Mac, Linux, Windows
-
Make sure you choose to install the version for your operating system.
-
Open VS Code
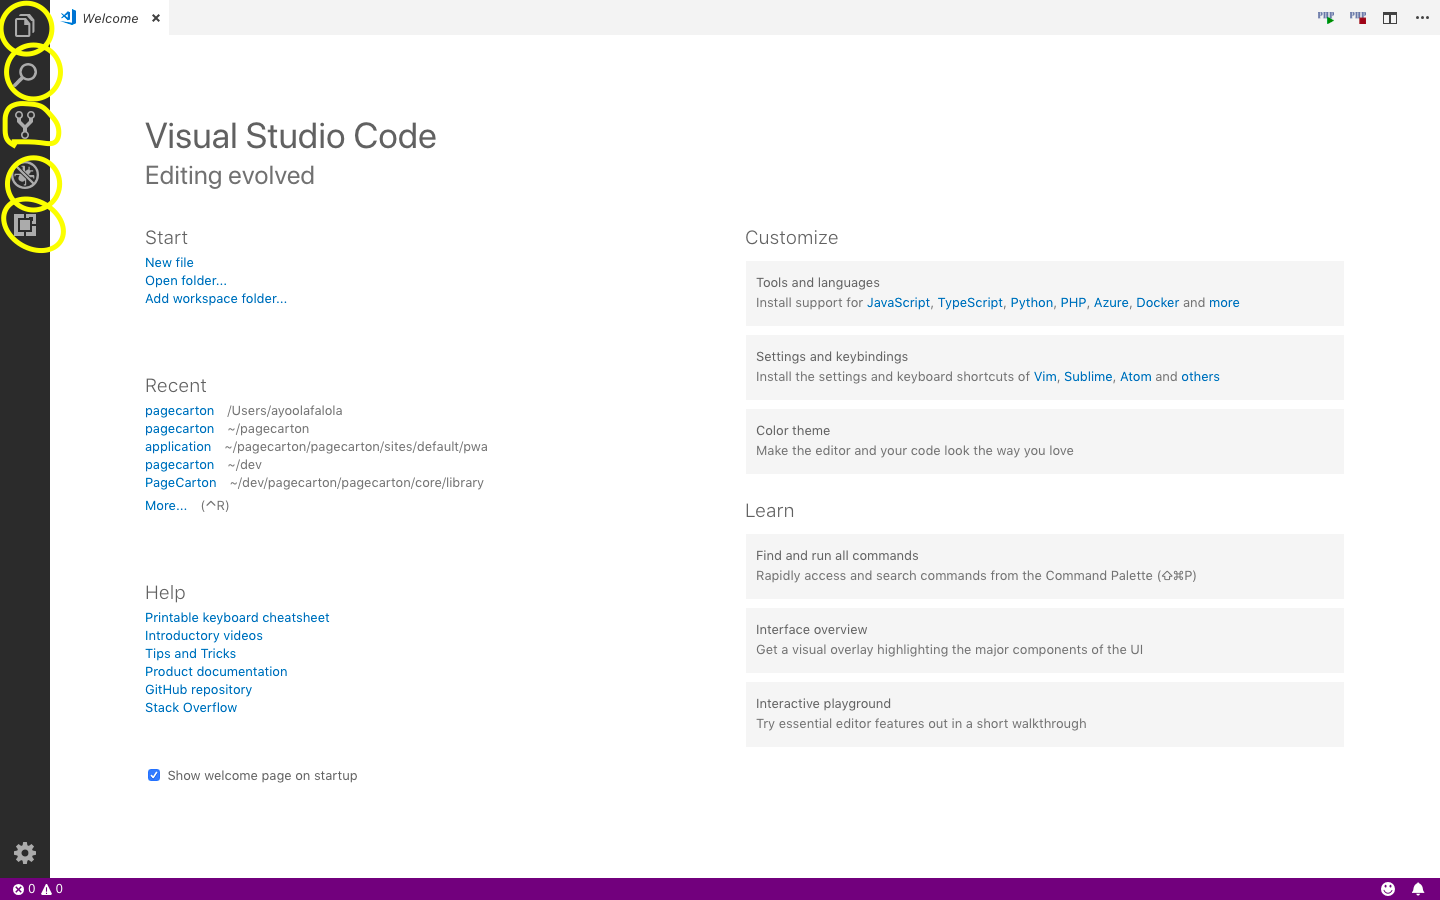
VS Code File Options
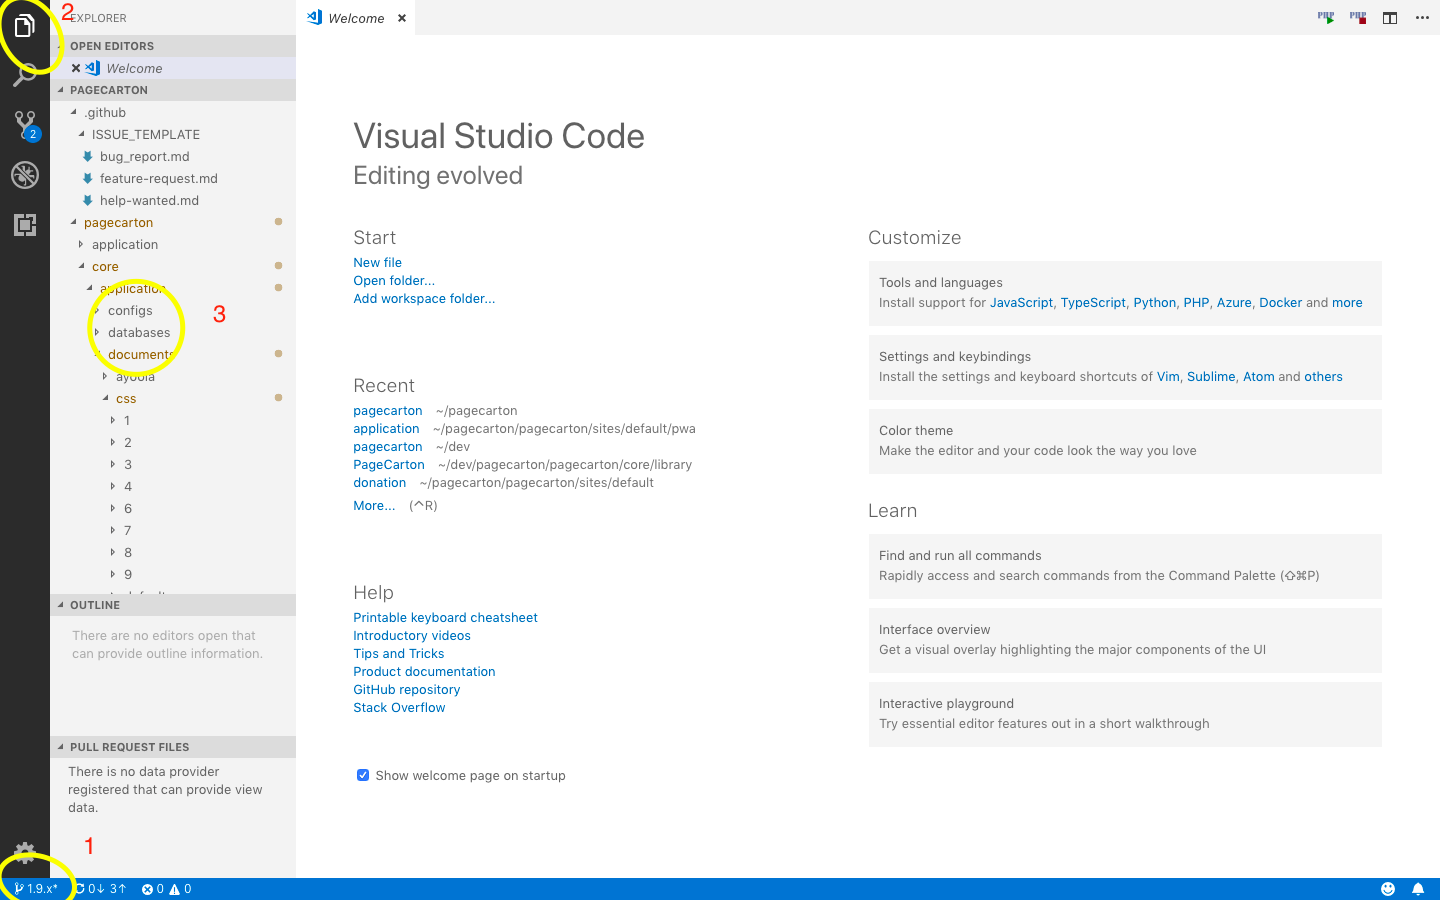
These are Options to the top left corners allow us to manage the files and updates to them. These are the options we are going to be using the most to update core files. They are:-
Explorer - first option on the top left corner allows you to view all the files in the current project and select the one we want to edit
-
Search - Allows you to search the files using any term or keywords
-
Source Control - View files that has recently been changed. This is where you have options to commit and push changes to the remote GIT
-
Debug - Get tools to debug codes for errors, etc.
-
Extensions - Download more extensions to VS Code to enhance performance.
-
Set up Git
PageCarton core files are hosted on Git, so you need GIT to be able to post your contributions to PageCarton. Before you start using Git, you have to make it available on your computer. Even if it’s already installed, it’s probably a good idea to update to the latest version. You can either install it as a package or via another installer, or download the source code and compile it yourself. Follow the following to set up Git:
- Install Git
There are a number of ways to install Git depending on your operating system. Instructions on getting git installed is provided here: Install Git
- Clone your forked PageCarton Github repository to your local system.
On Git Command line or teminal say:# Go to your home directory cd /home/~ # clone your forked PageCarton repo locally git clone https://github.com/myusername/pagecartonMake sure you change "myusername" to the username so that is yours so that the clone url is the url of your fork version. This process will help you synchronize your github repository with your local system. So that whenever you make any changes locally, you could "push" the changes to Github with just a single command.
- You should now have a directory like /home/~/pagecarton/pagecarton/core. That is now your development copy of PageCarton. So find the full path to where the directory is located e.g. /home/~/pagecarton/pagecarton. Don’t forget to replace "myusername" which your current username. Copy that directory, let's call it "Development PC Base"
- Change the core directory of your installed PageCarton to the cloned Development PC Base. How? Edit the contents of "pagecarton.json" in your web root so that "PC_BASE" is set to the Development PC Base, e.g. "/home/myusername/pagecarton/pagecarton". Remember, this path to the directory holding the cloned "core" directory and not the path to the "core" directory itself. The file content should now look like the following
{
    "PC_BASE": "/home/examplelocaluser/pagecarton/pagecarton",
    "application_dir": "",
    "run_as_core": true,
    "repository": ""
}
- Set the right permissions on the Development PC Base so that the web server can read and right the contents. This is needed because the website most likely isn't running as the same user and privileges as you, so it may not be able to access the files you created. Remember you create the cloned files using your user on terminal. This is especially important on Linux machines. So go to the terminal
# Go directory where the clone is
cd /home/~

# set the right file ownership and permissions
# ideally, the pagecarton directory must be readable and writable
# by the user running the web server.
# usually this user is www-data or apache or nginx or daemon
chown -hR www-data:www-data pagecarton

# alternatively, set global permissions  (not recommended except for extreme local dev)
# chmod -R 0777 pagecarton
How to make Changes
There are a number of ways to make changes to PageCarton Core from your local environment. The two commonest methods are:
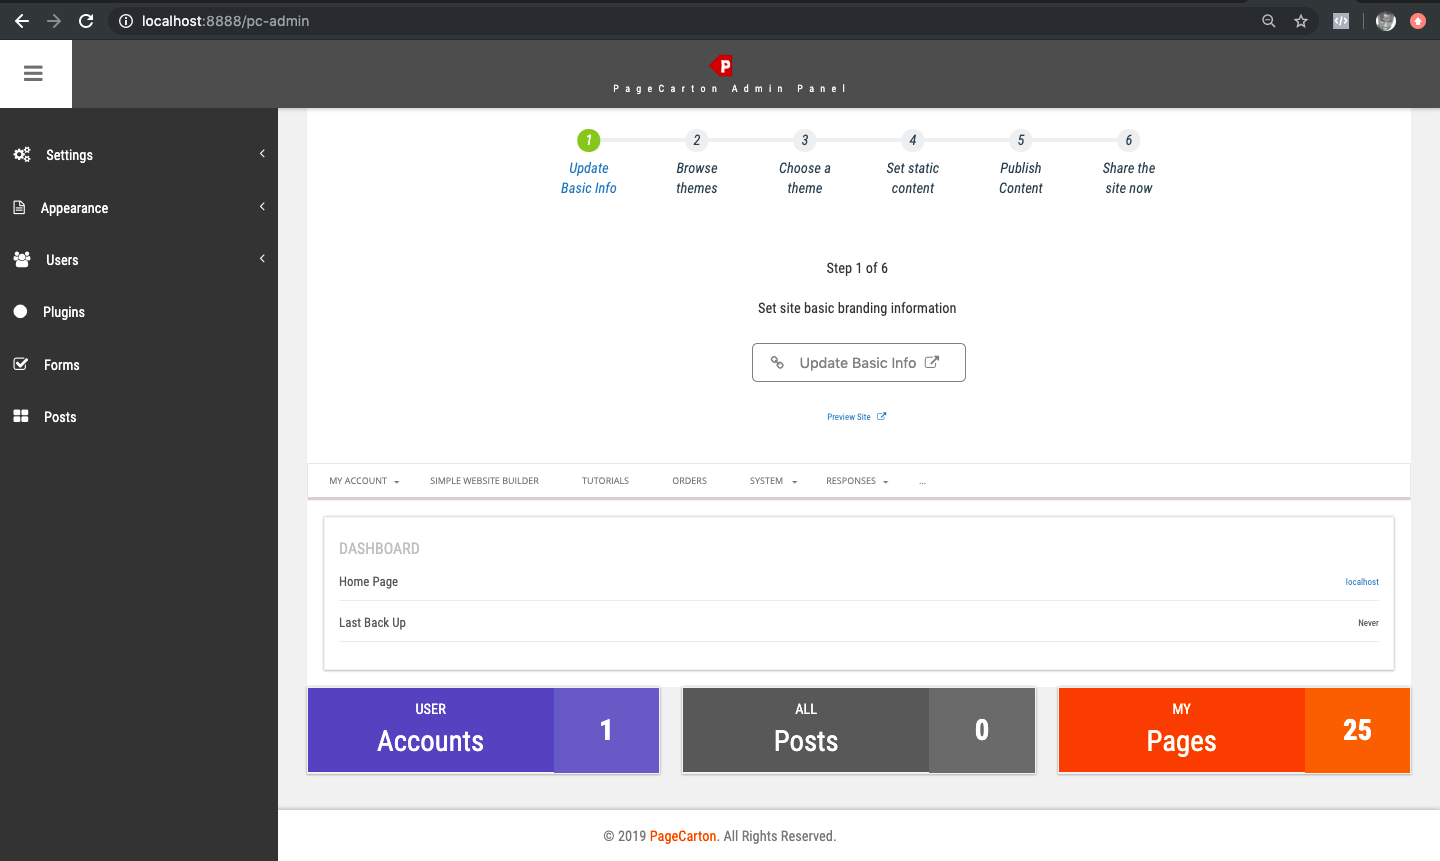
- Change PageCarton from the browser
PageCarton is fully made to be editable easily through any internet/web browser. To make changes through the web browser, go to the Admin Panel of your local PageCarton installation, which is usually by typing "localhost/pc-admin" in the address bar of the web browser of your choice. You may need to log in with the username and password you created while installing PageCarton. Once you are logged into the admin panel, you can go ahead and make your changes.
A lot of changes can be made through this method. In fact some changes can only be made through this method, especially things pertaining to adding or updating content. For example:
- Creating and Updating Pages & Themes
- Inserting records and items to core databases
- Adding new settings
- Creating widgets, wrappers, etc
- Creating, updating Navigations & menu options
- Creating and managing Privileges and Access Levels
- etc
- Edit the core files directly using the code editor. In a lot of other cases, it is easier to just open a core file directly and begin to edit it. Some files are especially made to only be easily editable in this regards, especially when it pertains to changing of the functionalities or style.
To edit files directly, open the directory in VS Code, Go to "Files" on the windows menu, then "Open" then select the directory where PageCarton is cloned to
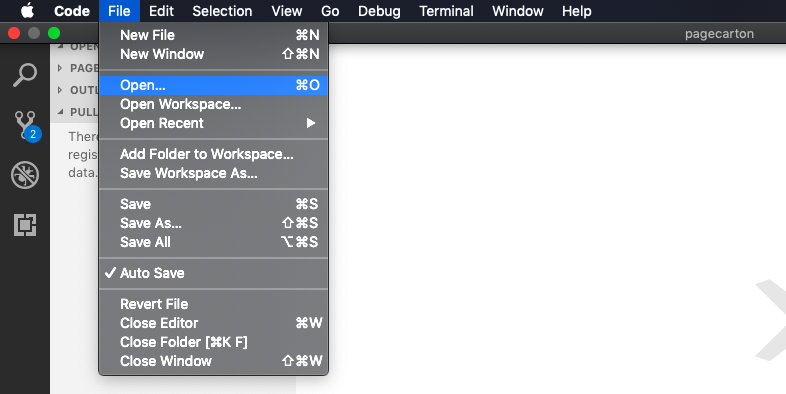
and
First, make sure the branch showing on the lower left corner of the screen is the version of PageCarton you wish to update. Secondly, make sure you are on the explorer pane. Thirdly, select the file you wish to edit directly and it will be opened in the code view. Go ahead and make any changes you want to the files. Do this for all the files you wish to change
Files available optimized to be edited directly includes:
- Widget Class Files
- Database Class Files
- PageCarton CSS file "/pagecarton/core/application/documents/css/pagecarton.css"
- PageCarton Bootstrap Installer "/pagecarton/core/application/documents/pc_installer.php"
- PageCarton Bootstrap Controllers in "/pagecarton/core/local_html"
- index.php
- .htaccess
- web.config
- PageCarton JS Files in "/pagecarton/core/application/documents/js"
Good to note that everything in/out of PageCarton are files and could be directly editable through any method that's convenient. Whenever changes are made, it is recorded in the local git and the changes would be ready to be "pushed" to the remote github you cloned.
Pushing Changes to Git
The process of making the changes you make locally reflect on the remove Github account is called a "push". You can do this either of two easy ways:
- Using VS Code
When using VS Code to update files, or whenever an update has been made to the core files and directories, VS Code "Source Control" option will be updated, listing the changed files and the option would have the the number of changed files.
- Click on "Source Control" option on the top left corner of VS Code (usually the third option from top)
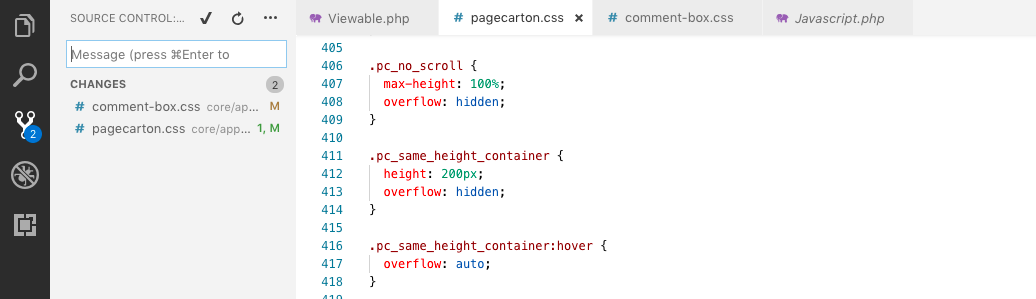
- Enter a "commit message" into the "Message" field and press Cntrl/Command + Enter to commit the changes. The commit message could be any short phrase that describes the update that was being made.
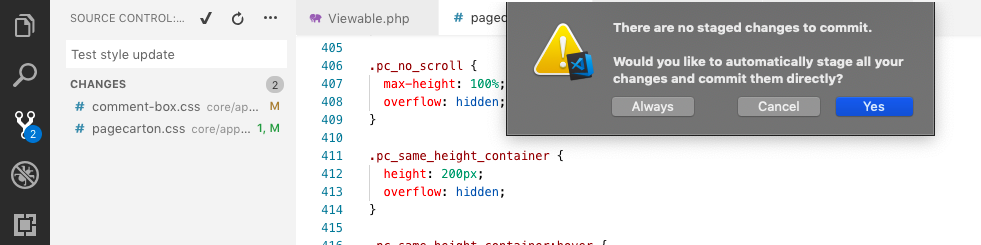
- If asked if "There are no staged changes to commit.", Select "yes" to "automatically stage all your changes and commit them directly".
- All the files listed as changed would have been cleared from the list because they have been "committed".
- Push the "committed" changes to the remote GIT
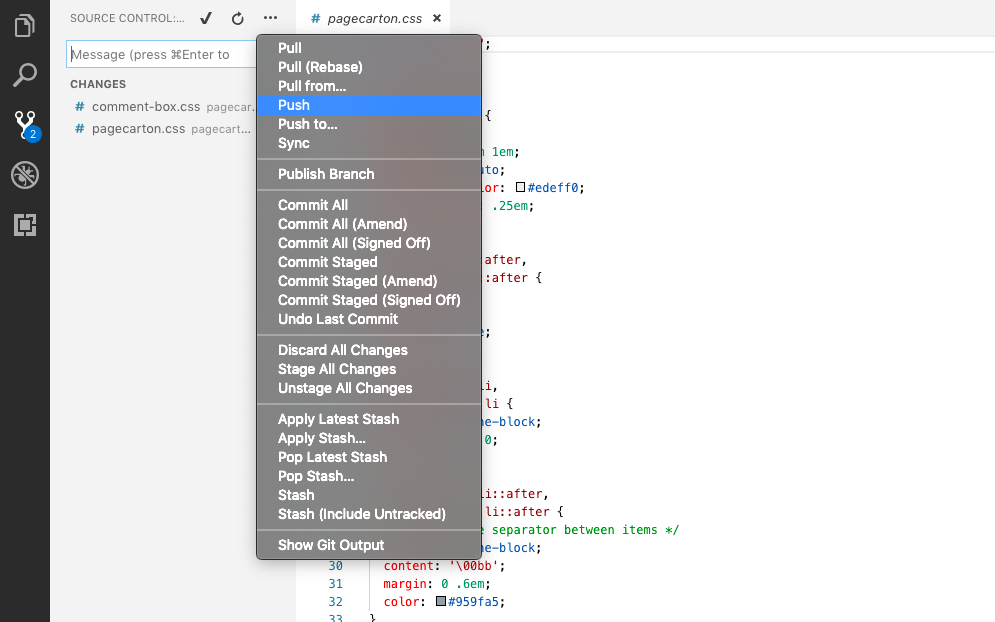
- Click the three dots on top of the "Source Control" panel to bring up the source control options
- Click on "Push"
- If required, enter the Gihub username and password.
- Check the changes on your github repository if your commit changes have been reflected.
- Click on "Source Control" option on the top left corner of VS Code (usually the third option from top)
- Using Commands on the terminal
Whenever changes has been done on your local git repository, you could change to the directory on the commandline/terminal and issue the git command to commit and push the changes
# Go directory where the clone is
cd /home/~/pagecarton/pagecarton

# commit changes
# update the commit message to short phrase about the changes made
git commit -m "Change titles and styling on homepage"

# The "push" command is used to publish new local commits on a remote server.
git push
Merging Changes with Main PageCarton Repository
What we have been doing is to create a copy (called "fork") of the main PageCarton repository to make our update, so we could indepently make changes and test new functionalities. Once the update has been made and tested, we can now merge our own repository with the main repository. This is called a "Pull Request". When a pull request is made, the contributors of the main PageCarton repository will be notified of the request and they have the duty to review the pull requests and perform the merge of the codes thereafter.
This is how you make a pull request:

Go to the github page of your forked PageCarton. The page URL should be something like https://github.com/myusername/pagecarton. Change "myusername" to your Github username.
- Switch to the branch you are working on, e.g. "1.9.x"
- There will be a notice of whether this branch/fork is behing or ahead of the main pagecarton. Behind indicates that the main PageCarton repository has been updated a number of times since you "forked" it. Ahead means that you have added some commits to your own branch since you forked it.
- Click on "Pull Request"
- In the next screen, compare changes and submit your pull request
- Wait for the review, many times, the contributors may engage you through email and online chats to be able to understand some part of the code.