This article explains how to add functional Edit and Delete buttons to content items in PageCarton, using direct URL links to PageCarton edit and delete page. These buttons allow owners and administrators to easily manage individual content entries without needing to browse through the backend manually.
Why Add Edit and Delete Buttons?
This is especially important for maintaining efficient workflows and by enabling inline editing and deletion, you ensure that authorized users can manage content quickly, directly, and securely.
Once you have your content set up in PageCarton, you can add an Edit and Delete buttons to allow authorized users to modify specific content entries directly from the frontend. This button links to the PageCarton content editor using a structured URL that includes the object's unique identifier, typically article_url.
Step-by-Step Implementation
Step 1: Add the Edit Button Url
To include an Edit button url that links to PageCarton's content editor:

- The {{{article_url}}} placeholder dynamically targets the current article.
- This link opens the article editor in a new tab.
Step 2: Add the Delete Button Url
To enable a Delete option with a confirmation dialog:
- This button triggers the delete operation for the respective content.
- The onclick confirmation helps prevent accidental deletions.
Step 3: Embed Buttons in a Widget or Template
You can combine both buttons and place them inside any widget or layout. Here's a sample implementation: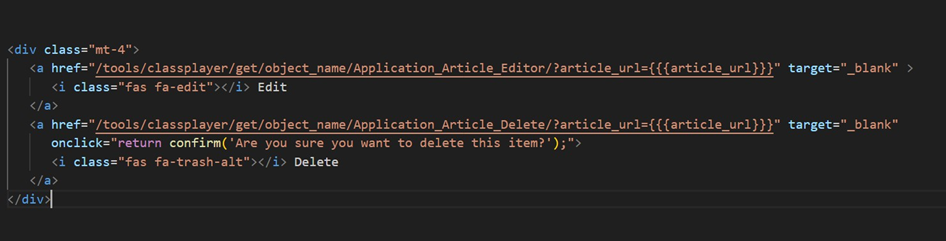
This example ensures that each piece of content rendered includes its corresponding edit and delete actions.
Once you have your content set up in PageCarton, you can add an Edit button to allow authorized users to modify specific content entries directly from the frontend. This button links to the PageCarton content editor using a structured URL that includes the object's unique identifier typically article_url.